
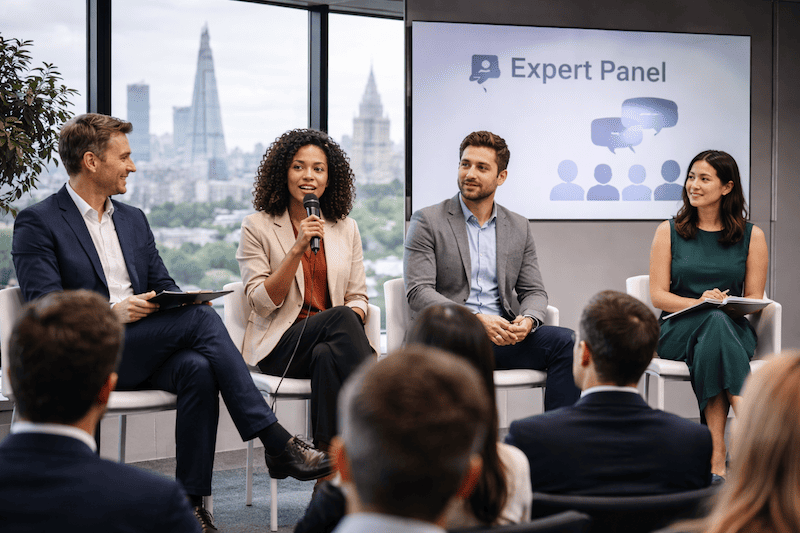
Recording Panel Discussions in London
Panel discussions are a valuable platform for sharing insights, discussing important topics, and exchanging ideas among experts in various fields. In London, a city known for its diverse range of industries and expertise, these discussions frequently take place in conferences, seminars, and events.
Recording panel discussions allows you to preserve these valuable conversations for future reference, sharing with a wider audience, or generating content for online platforms. By capturing the dialogue, viewpoints, and expertise shared during these discussions, you can create a lasting record that can benefit both the participants and those who were unable to attend in person.
In this guide, we will explore the importance of recording panel discussions, how to choose the right equipment for optimal recording quality, and essential tips for capturing high-quality audio and video footage during these events. Whether you are an event organizer, content creator, or simply interested in documenting panel discussions, this guide will provide you with the necessary knowledge and tools to successfully record these insightful conversations.
Why is recording panel discussions important?
Recording panel discussions is important for several reasons. First and foremost, it allows you to capture valuable content and insights shared during the discussion. Panel discussions often involve experts in a particular field sharing their knowledge, opinions, and experiences. By recording these discussions, you have the opportunity to preserve this information for future reference.
Furthermore, recording panel discussions enables you to reach a larger audience. Not everyone can attend every panel discussion in person, but by recording and sharing the discussion online, you can make it accessible to a much wider audience. This can help to amplify the impact of the discussion and ensure that more people benefit from the valuable insights shared.
Recording panel discussions also provides a way to enhance your organization’s visibility and credibility. By capturing and sharing engaging discussions with thought leaders in your industry, you can establish your organization as a reputable source of information and expertise. This can help to attract new clients, customers, or partners and strengthen your brand reputation.
Finally, recording panel discussions can be a valuable learning tool. Reviewing a recorded panel discussion can help you identify key themes, trends, and insights that may have been missed during the live event. It can also serve as a valuable resource for training and development purposes, allowing you to revisit the discussion and extract important takeaways.
Choosing the right equipment for recording panel discussions
When it comes to recording panel discussions in London, having the right equipment is essential for producing high-quality and professional recordings. Here are some key factors to consider when choosing the right equipment:
- Quality recording devices: Invest in high-quality cameras and microphones that can capture clear audio and crisp video. Consider using DSLR cameras for video recording and external microphones for picking up voices on the panel.
- Audio interfaces and recorders: Audio interfaces are essential for connecting microphones to your recording devices. Choose audio recorders that can capture multiple audio channels independently for better control during editing.
- Tripods and stabilizers: To avoid shaky or blurry footage, use tripods or stabilizers to keep your cameras steady during the panel discussion recording.
- Proper lighting equipment: Good lighting is crucial for achieving a professional look in your recordings. Invest in lighting kits or softboxes to ensure that your panel members are well-lit and easy to see on camera.
- Cables and accessories: Don’t forget to stock up on cables, adapters, and other accessories needed to connect your equipment and ensure smooth operation during the recording.
Before making any purchases, consider your budget, the size of the venue, and the specific needs of your panel discussion. It’s important to strike a balance between affordability and quality to achieve the best results.
Setting up the recording equipment for panel discussions
When it comes to recording panel discussions in London, setting up the right equipment is crucial to ensure a successful recording. Here are some tips to help you get started:
- Choose the right location: Make sure to select a suitable location for the panel discussion that is well-lit and free from distractions. Also, consider the room acoustics to ensure clear audio recording.
- Prepare the cameras: Position the cameras strategically to capture all panelists and guests clearly. Test the angles to avoid any obstruction or glare during the recording.
- Set up the microphones: Use high-quality microphones to capture clear audio from all panelists. Place the microphones strategically to pick up voices effectively without any distortion.
- Connect all equipment: Ensure that all cameras, microphones, and recording devices are properly connected and functioning before the panel discussion begins. Test the audio and video quality to make any necessary adjustments.
- Plan for lighting: Adjust the lighting in the room to enhance the visual appeal of the recording. Make use of proper lighting equipment to avoid shadows or washed-out colors on the video recording.
- Have backup equipment: Always have spare batteries, memory cards, and cables on hand in case of any technical issues during the recording. This ensures that the recording process continues smoothly without interruptions.
By following these simple steps and properly setting up the recording equipment for panel discussions, you can ensure a professional and high-quality recording that captures all the valuable insights shared during the discussion.
Tips for capturing high-quality audio in panel discussions
When recording panel discussions in London, it is essential to ensure that the audio quality is top-notch. Poor audio can detract from the overall viewing experience and impact the effectiveness of the content being discussed. Here are some tips for capturing high-quality audio in panel discussions:
- Use the right microphones: Invest in high-quality external microphones to capture clear audio from each participant on the panel. Omnidirectional mics are great for capturing sound evenly from all directions, while lapel or lavalier mics can be used for individual speakers.
- Position the microphones correctly: Place the microphones strategically to ensure they are picking up clear audio from each speaker. Make sure they are not too close to the speakers, as this can lead to distortion, but also not too far away to capture ambient noise.
- Reduce background noise: Choose a quiet location for the panel discussion recording and try to minimize any background noise that may interfere with the audio quality. Close windows, doors, and use soundproofing materials if necessary.
- Monitor audio levels: Keep an eye on the audio levels throughout the recording to prevent clipping or distortion. Adjust the levels as needed to maintain a consistent and clear sound for all speakers.
- Test the audio equipment: Before starting the panel discussion recording, do a sound check to ensure that all microphones are working properly and that the audio is being captured effectively. Make any necessary adjustments before the discussion begins.
- Record in a controlled environment: Choose a location that has good acoustics and minimal distractions to ensure optimum audio quality. Avoid recording in noisy or echoey environments that can degrade the sound.
- Use post-production tools: After the recording is done, use audio editing software to enhance the sound quality further. You can adjust the levels, remove background noise, and optimize the sound to make it more appealing to listeners.
Lighting considerations for recording panel discussions
When recording a panel discussion in London, it’s essential to pay attention to the lighting to ensure that your video looks professional and visually appealing. Good lighting can make a significant difference in the overall quality of your recording.
- Natural vs Artificial Lighting: If possible, try to take advantage of natural light by positioning your panel discussion near windows. However, this can be a challenge in London with its unpredictable weather. In that case, use artificial lighting to ensure consistent brightness throughout the recording.
- Soft Lighting: Harsh lighting can create unflattering shadows on the faces of the speakers. To avoid this, use soft lighting sources such as diffused light or softboxes. This helps to create a more even and flattering light on the speakers’ faces.
- Directional Lighting: Position your lights strategically to avoid glare and ensure that each speaker is well-lit. Using a three-point lighting setup can help create depth and dimension in your recording.
- Avoid Mixed Lighting: Try to stick to one type of lighting source to maintain consistency. Mixing different kinds of light (e.g., fluorescent and incandescent) can create color imbalances and affect the overall quality of your recording.
By considering these lighting tips, you can enhance the visual appeal of your panel discussion recording in London. Remember, good lighting not only improves the overall look of your video but also enhances the viewer’s experience.
Camera angles and positioning for capturing panel discussions
When it comes to recording panel discussions in London, one of the key factors to consider is the camera angles and positioning. This is crucial in ensuring that the viewers are engaged and can follow the conversation smoothly.
- Wide shot: Start by setting up a wide shot that captures the entire panel and audience in the frame. This shot provides an overview of the discussion and helps viewers understand the dynamics of the panel.
- Close-up shots: To add depth and engagement to the recording, incorporate close-up shots of individual panelists as they speak. This allows viewers to connect with each speaker on a personal level and enhances the viewing experience.
- Over-the-shoulder shot: Another effective angle is the over-the-shoulder shot, which provides a perspective from behind a panelist’s shoulder. This adds a different dimension to the recording and offers a unique view of the discussion.
- Multiple camera angles: To create a dynamic and visually appealing recording, consider using multiple camera angles to capture different perspectives during the panel discussion. This can help maintain viewer interest and highlight key moments in the conversation.
When positioning the cameras, ensure that they are strategically placed to capture the best angles and maintain focus on the speakers. Avoid obstructing the view with equipment or audience members, and make adjustments as needed to accommodate any changes during the discussion.
By carefully considering camera angles and positioning, you can create a compelling recording of the panel discussion that captures the essence of the event and keeps the viewers engaged throughout.
Now you can move on to the next section about conducting test runs before recording the actual panel discussion.
Conducting test runs before recording the actual panel discussion
Before hitting the record button for the actual panel discussion, it’s crucial to conduct test runs to ensure everything is in place and running smoothly. Think of it as a dress rehearsal – you want to iron out any potential kinks before the main event.
- Check your equipment: Ensure that all your recording equipment, including cameras, microphones, and lighting, are working properly. Test each piece of equipment and make any necessary adjustments to prevent any technical issues during the actual recording.
- Test audio levels: Have the panelists speak to test the audio levels and ensure everyone can be heard clearly. Adjust microphone positions or sensitivity if needed to capture high-quality audio.
- Explore camera angles: Experiment with different camera angles and positions to find the best shots for capturing all the panelists without any obstructions. Test the lighting and make adjustments to avoid any dark or overexposed areas in the frame.
- Practice transitions: If you plan to switch between different cameras or microphones during the recording, practice those transitions during the test runs. Smooth transitions contribute to a more professional final product.
- Run through the agenda: It’s a good idea to run through the panel discussion agenda during the test runs to get a feel for how the flow of the conversation will go. This can help you anticipate any potential challenges and prepare accordingly.
Remember, the purpose of test runs is not to be perfect, but to identify any issues and make necessary adjustments to ensure a smooth recording process during the actual panel discussion. Putting in the time and effort to conduct test runs will ultimately result in a high-quality recording that captures the essence of the discussion accurately.
Managing audio levels during the panel discussion recording
One crucial aspect of recording panel discussions is managing the audio levels effectively. Poor audio can ruin an otherwise insightful discussion, so it is important to pay attention to this key detail.
Firstly, ensure that all microphones are working properly and positioned correctly to capture the voices of each participant clearly. Test the audio levels before the panel discussion begins to make sure everyone’s voice can be heard without distortion or background noise.
- Adjust the volume levels for each microphone to balance out the sound across all speakers. Make sure that no one is speaking too loudly or too softly compared to others in the discussion.
- Monitor the audio levels throughout the panel discussion and make adjustments as needed. It’s a good idea to have someone dedicated to overseeing the audio levels during the recording to ensure quality sound output.
- Avoid sudden loud noises or feedback by being mindful of the positioning of microphones and any potential audio interference. This will help prevent any interruptions during the panel discussion and maintain a smooth recording process.
Remember, clear and balanced audio is essential for capturing the essence of the panel discussion and creating a polished final product. By managing audio levels effectively, you can ensure that the recording will be of high quality and engaging for viewers.
Editing and post-production process for panel discussion recordings
Once you have successfully recorded your panel discussion in London, the next step is to edit and refine the footage to ensure a polished final product. Editing is a crucial part of the production process as it helps enhance the overall quality of the recording.
- Organize your footage: Start by sorting through the footage and organizing it into a logical sequence. This will make it easier to edit and ensure that you have all the necessary content.
- Trimming and cutting: Remove any unnecessary or repetitive footage to streamline the recording. Focus on highlighting key moments and insightful discussions from the panelists.
- Adding transitions and graphics: Enhance the visual appeal of your recording by adding transitions, lower thirds, and other graphic elements. This can help keep viewers engaged throughout the video.
- Audio enhancement: Clean up the audio quality by removing background noise, adjusting levels, and ensuring that all panelists are clearly audible. This can make a significant difference in the overall presentation.
- Color correction and lighting adjustments: Improve the visual aesthetics of the recording by correcting color tones and adjusting lighting levels. This can help create a more professional-looking video.
After completing the editing process, it’s important to go through a quality check to ensure that everything looks and sounds perfect. Make any necessary refinements before proceeding to the final step of exporting the video.
When exporting the video, choose the appropriate file format and resolution based on your distribution platform. Consider creating various versions optimized for different viewing platforms such as YouTube, Vimeo, or social media channels.
Remember to add any necessary branding elements, such as logos or intro/outro screens, to maintain consistency with your organization’s image. Once you are satisfied with the final product, it’s time to share and distribute the panel discussion recording with your target audience.
By following these steps, you can ensure that your panel discussion recording in London is visually appealing, engaging, and professionally produced.
Best practices for sharing and distributing panel discussion recordings
After you have recorded a panel discussion in London, the next step is to share and distribute the recording to reach a wider audience. Here are some best practices to keep in mind:
- Choose the right platform: Consider where your target audience is most likely to watch the recording – whether it’s YouTube, Vimeo, or another video-sharing platform. Pick a platform that aligns with your audience’s preferences.
- Optimize the title and description: Make sure that the title of your recording is clear, concise, and includes relevant keywords. The description should provide a summary of the discussion and include any key points discussed by the panelists.
- Promote on social media: Utilize social media channels to promote the recording. Share clips or highlights from the panel discussion to attract viewers and encourage engagement. Tag panelists and relevant organizations to increase visibility.
- Engage with your audience: Encourage viewers to leave comments, ask questions, and participate in the conversation surrounding the panel discussion. Respond to comments and engage with your audience to foster a sense of community.
- Collaborate with partners: Reach out to other organizations or individuals who may be interested in sharing the recording with their audiences. Collaboration can help broaden your reach and attract new viewers.
- Provide easy access: Make the recording easily accessible by including it on your website, embedding it in blog posts, or sending it out in newsletters. Ensure that viewers can easily find and watch the panel discussion recording.
- Monitor performance and adjust: Keep track of metrics such as views, engagement, and feedback to understand how your panel discussion recording is performing. Use this data to make informed decisions and improve future recordings.
By following these best practices, you can effectively share and distribute your panel discussion recordings to a larger audience in London and beyond.
Conclusion and Final Thoughts on Recording Panel Discussions in London
Recording panel discussions in London can be a rewarding experience, capturing valuable insights and perspectives from a diverse group of experts and thought leaders. However, it also requires careful planning, the right equipment, and technical know-how to ensure that you capture high-quality audio and video.
By choosing the right equipment, setting up the recording equipment properly, and paying attention to details such as lighting and camera angles, you can ensure that your panel discussion recordings are professional and engaging. Conducting test runs before the actual recording can help you identify and address any potential issues, ensuring a smooth recording process.
- Remember to manage audio levels during the panel discussion recording to ensure that all participants are clearly heard and understood.
- After the recording is done, the editing and post-production process is crucial for polishing the footage and making it ready for sharing and distribution.
And finally, when it comes to sharing and distributing your panel discussion recordings, consider best practices such as using social media platforms, websites, and email newsletters to reach your target audience effectively. By following these steps and taking care with your recordings, you can create valuable content that will inform and inspire your viewers.
Whether you are capturing industry insights, academic discussions, or community gatherings, recording panel discussions in London can provide a valuable resource for future reference and knowledge sharing. So, remember to plan ahead, pay attention to details, and have fun with the process – your audience will thank you for it!
More

Case : Event photography for Palisades Village
Palisades Village is a premier outdoor shopping and lifestyle destination in Pacific Palisades, California. Capturing events at such an iconic venue requires a blend of candid storytelling, detailed commercial shots, and high-energy atmosphere photography. Below is a breakdown of how we captured the essence and vibrant energy of this event. Every great event begins with […]
More
Case : Peony Field Photoshoot at Bury Lane Farm | Cambridge Photographer
This beautiful group portrait photography session took place in the breathtaking peony fields of Bury Lane Farm in Cambridgeshire. As a Cambridge photographer specialising in portrait photography and lifestyle photography, I love creating natural images that capture genuine emotions and meaningful moments. Nine wonderful women came together to enjoy an unforgettable summer afternoon surrounded by […]
More
Case : Professional Headshot Photography in West Hollywood
I delivered personalized headshot photography sessions in West Hollywood for professionals seeking high-impact images for articles, corporate profiles, and social media. Client: Professionals and musicians looking to elevate their personal branding with compelling portraits. Objective: To create confident, authentic images that help clients make a memorable first impression. Process: 1. Consultation Discussed each client’s style […]
More